How to Make A Stencil?
We are naturally drawn to design and style in our lives. And stencils are a vivid expression of this trait. Through them, we transfer our innovative designs from imagination to reality.
Stencil making is a favorite tool in the DIY community for customization, applicable in areas from paintings and signage to custom apparel. However, achieving precision with manual tools is challenging and requires effort. Laser cutting has made stencil creation effortless, fueling momentum for DIY projects.
In this article, we delve into why laser cutters are the ideal choice for DIY stencil making. We will guide you through crafting your stencil and explore creative applications of stencils.
In This Article
- Why Use Laser Cutters for Stencils Making?
- Materials and Tools Needed
- How to Make Your Own Stencils: The Complete Process
- Creative Applications of Stencils
- FAQs on Making Stencils
- Conclusion
Why Use Laser Cutters for Stencils Making?
Making stencils through manual cutters and knives is a cheaper alternative, but the method is hard and time-consuming. Also, it does not provide the best results, particularly when you’re creating intricate designs.
Laser cutters offer the best solution for your cutting needs because they save time, are more precise, and let you cut a range of materials and thicknesses.
Time Efficiency Over Manual Cutting
When cutting manually, you need to trace the design with a knife or cutter while maintaining a steady hand. This process requires significant time and effort. A single misstep could ruin the stencil.
In contrast, with laser cutting, you simply place the stencil sheet under the laser cutter, input the design, and it automatically cuts in just a few seconds.
Precision in Detail
Manually cutting intricate designs, especially those with fine details, is challenging for beginners. This limits them to creating simpler stencils.
However, laser cutters help you create even the most detailed designs with precision. Their sub-millimeter spot size ensures that the stencil accurately replicates the digital design.
Compatibility with Various Materials
Unlike manual methods that may struggle with thicker or tougher materials, laser cutters handle various thicknesses with ease. With them, you are not limited to just thin, easy-to-cut sheets but can work with an array of materials.
Reduced Mess and Material Waste
Cutting with manual cutters may result in uneven edges and excess waste. But, with laser cutters, the design is cut cleanly according to specified dimensions. This not only makes the process cleaner with no messy edges but also more economical, as it maximizes the use of your materials.
Materials and Tools Needed
See; how beneficial it is to make stencils with a laser cutter. Now, here is what you need to make a stencil:
Stencil Sheet
Basically, you need a very thin sheet of material for making stencils. But not all materials are made for that. Some common choices are:
Paper and Cardboard: Paper, being the cheapest and most accessible, is perfect for quick, small-scale projects, like decorating bakery items or creating simple art pieces. Cardboard is also cost-effective but a bit stiffer. It is best for printing on flat surfaces like walls.
Mylar: Mylar stencils are the most popular option due to their durability and transparency. They are from a type of polyester, which is tear-resistant. Some Mylar sheets are even food-grade, which makes them safe for culinary applications.
Vinyl: Vinyl’s flexibility makes it a top pick for custom DIY projects. It is particularly popular in the world of fabric printing for customizing t-shirts. Some vinyl sheets come with an adhesive backing. So, you can paste or wrap them around objects for precise design transfer.
Metal Sheets: Metal sheets are rigid and best suited for industrial applications and scenarios, where you want to reuse the same stencil multiple times.
A Laser Cutter
A laser cutter is also needed for precise and accurate cutting of stencil sheets. Typically, all laser machines – diodes, CO2, and fiber lasers – would cut the stencils. But considering the small-scale use case, diode laser machines are cost-effective.
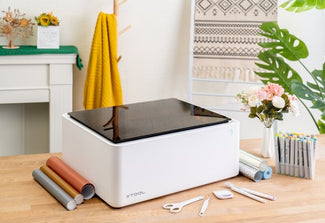
xTool M1 is the market’s first and only hybrid laser and vinyl cutter. It not only comes with a 10W diode laser to cut common materials (paper, cardboard, fabric, mylar) but also a blade cutter for vinyl cutting (which is not suitable for laser cutting). It’s compact, powerful, and safe for all users.
How to Make Your Own Stencils: The Complete Process
Stencil making has become much simpler and quicker, thanks to the introduction of laser cutting machines.
Here’s a quick procedure to follow for making a laser cut stencil:
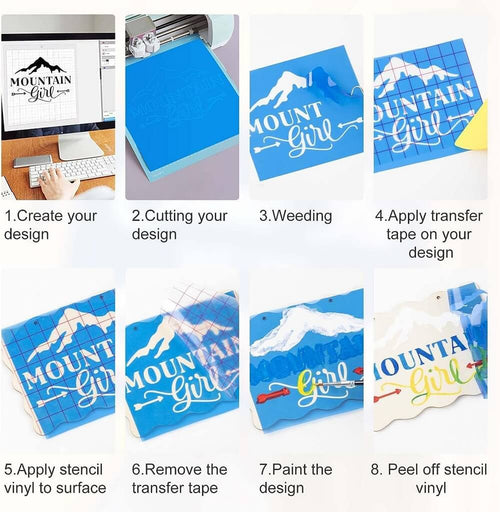
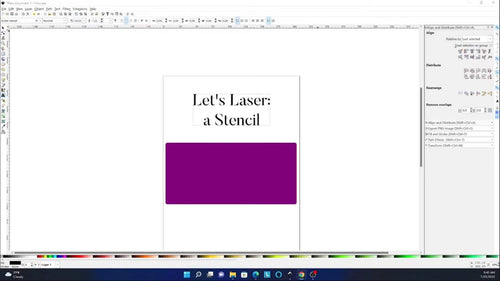
1. Digital Design Creation: Craft your stencil design with graphic design software. Make sure the design only has the stencil pattern or lettering without any overlapping lines.
2. Material Selection: We mentioned some material options earlier. Pick a material, best suited for your project. For instance, you may use paper for bakery stencils and vinyl for t-shirt printing.
3. Laser Cutter Setup: Open the laser engraver software and get yourself a hang of its settings. Input the material thickness and set other parameters, such as power, and speed. When using xTool, use these recommended material settings.
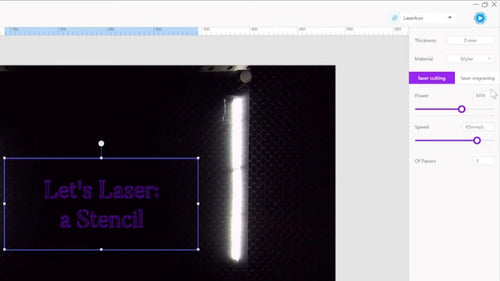
4. Stencil Sheet Placement: Position the material on the work bed. Align the design with the workpiece as per the software preview.
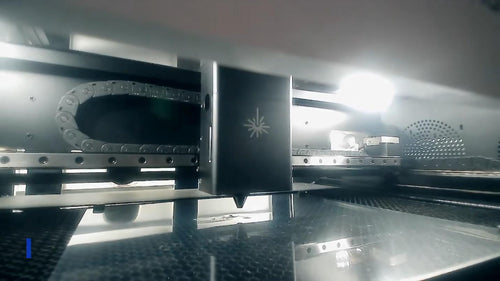
5. Stencil Cutting: Activate the framing option for a laser path preview. Once confirmed, commence the laser cutting operation.
6. Cleanup After Cutting: Post-cutting, lightly clean the stencil to remove any residual particles.
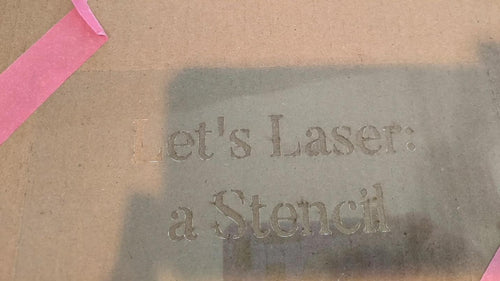
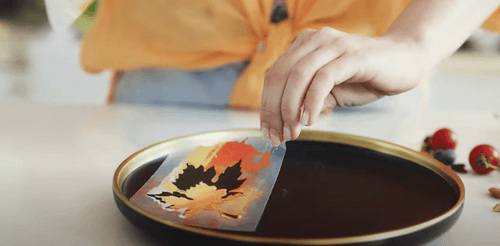
7. Stencil: Your stencil is ready! You can now stylize your items using paints, sprays, or inks.
Creative Applications of Stencils
After you’ve mastered the art of creating stencils. Here are a few examples of how this skill can be used in different projects:
Customized Fabric Printing
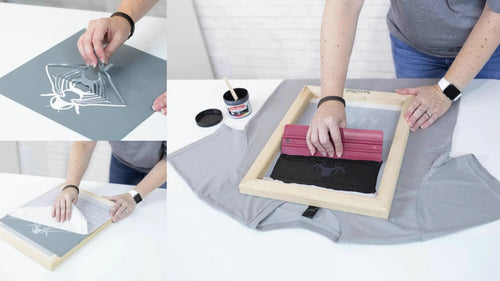
Stencils are fantastic for
Home Décor
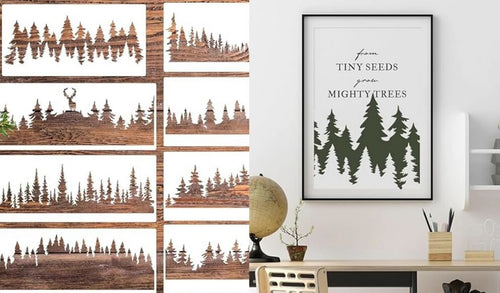
Want to create or add flair to walls, add unique patterns to furniture, or even floors? Stencils can help. Whether it’s a geometric pattern on a feature wall or a floral design on a wooden table, stencils help achieve that bespoke look for your living space.
Art Projects
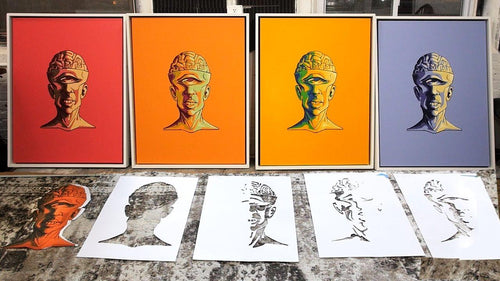
Stencils are a catalyst for creativity in art projects. The layered paintings are one of the artist’s favorite drawings. They also assist them in executing complex designs with ease, adding depth and intricacy to canvases. This opens up new avenues for artistic expression and experimentation.
Bakery Items
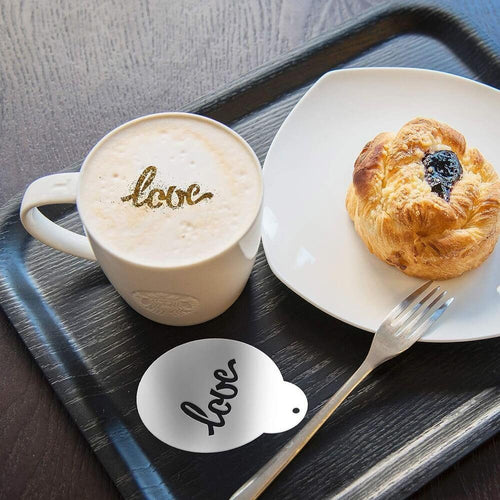
Those who love decorating bakery items, know the significance of stencils. Delicate designs on frosting or a dusting of cocoa on a latte – stencils add a personalized touch and fun to any bakery treat. They are the key to edible masterpieces.
Sign Boards

Stencils redefine sign-making. Bold, colorful signs and nameplates become effortless. They offer precision that hand-painting can’t and ensure every letter and design element is crisp and uniform. Perfect for business signage, registration plates, or a personalized nameplate for your home.
Pottery, Glass, and Ceramic Items
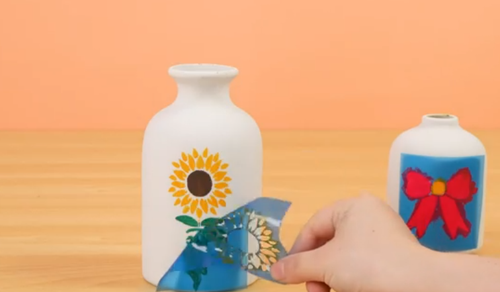
For decorating curved surfaces like pottery, glass, and ceramics, flexible stencils are the best. You can easily wrap them around the object, and paint them to stylize and personalize items.
FAQs on Making Stencils
What is the Best Material to Use to Make a Stencil?
Mylar is one of the best materials for making stencils. It is popular for its durability, flexibility, and tear resistance. Its transparency helps in accurate placement. Moreover, it’s also available in food-grade variants.
How Do You Make Stencils for Painting?
To make stencils for painting, first, layer your design in a software program. Create a separate layer for each color or design element. Then, laser cut those designs and use them one by one to create a multi-colored painting.
Conclusion
Stencils offer a wide range of applications, whether it's adding a geometric pattern to a wall, creating custom shirts, engaging in painting, or even decorating. Although manual tools can serve these purposes, they require considerable hand skill and effort. In contrast, laser tools like xTool M1 simplify the process of stencil cutting with automation and precision.
Get your xTool now, and show us your creative side!
For more questions. Please join our Facebook group to get inspired!

Related Articles
How to Engrave Glass: Top 3 Ways Explained
How to Sub-Surface Laser Engraving Glass Ball?