How to Print on Wood?
Wood, due to its distinct hues, textures, and durability, is a preferred choice for a variety of projects. Think about the different uses wood has, even beyond the common ones. In fact, the paper we use every day comes from pulpwood.
Just like printing vibrant designs on paper, we can also print on wood. This technique is perfect for crafting personalized stationery and unique art pieces.
In this article, we will explore two methods for printing on wood. We will also discuss the tools you need and step-by-step procedures for each method.
In This Article
- Method 1: Laser Printing on Wood
- Method 2: Screen Printing on Wood
- Creative Ideas and Applications of Wood Prints
- Conclusion
Method 1: Laser Printing on Wood
Laser printing, commonly known as
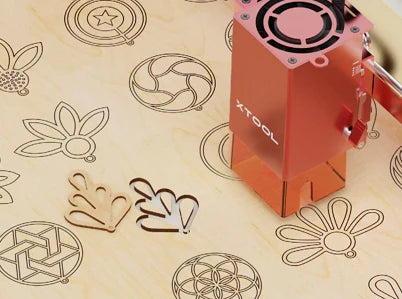
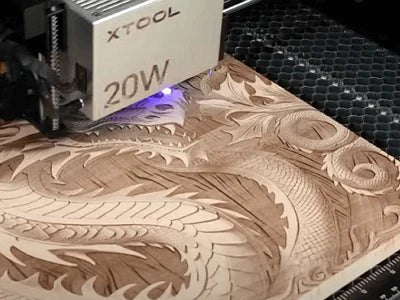
When the laser beam touches the wood, it burns and vaporizes the area, leaving behind an engraved image or text. The intensity of the laser can be adjusted to achieve different depths and shades. This helps in creating intricate patterns and varying textures.
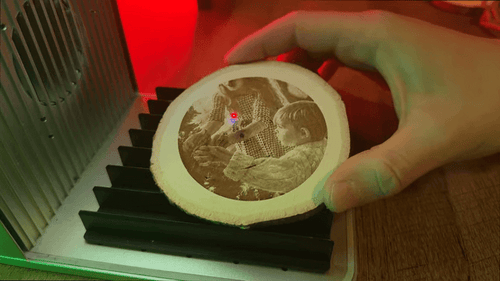
Wood laser engraving is popular for its precision and ability to produce complex designs with remarkable clarity. It is used for creating customized wooden accessories and artwork. You can even
Materials Needed
For laser printing on wood, you’ll need these materials:
Wood: Most types of wood are suited for laser engraving. However, each wood gives off a different texture and hue when engraved. Generally, for laser engraving and wood printing, we recommend light hue softwoods like alder, basswood, balsa, and pine.
Laser Engraver: You also need a laser engraver. CO2 laser engravers, like xTool P2 are the first choice for wood. However, for basic engraving jobs, diode laser engravers (xTool S1 and M1) are also effective.
Step-by-Step Process
Here’s a complete procedure for laser print on wood:
1. Start by lightly sanding the wood to create a smooth surface free of imperfections.
2. Use a cloth to wipe off any debris or dirt resulting from the sanding process.
3. (Optional) Apply masking tape to the wood to avoid burn marks during engraving. Alternatively, you can also use an air assist while engraving wood.
4. For wood types with high resin content, soaking it in water before engraving can yield better results.
5. Your engraving requires a grayscale image with the design only, no background. If your image isn’t already in this format, convert it for optimal engraving quality with software like Imag R.
6. Place the wood in the laser engraver. Then, position your design over it using the laser control software.
7. Before starting, use the framing function to test the positioning of your design. If everything looks good, proceed with the engraving.
8. Once the engraving is complete, clean off any wood residue and dust. Optionally, you can enhance your work with lacquer or paint.
Method 2: Screen Printing on Wood
©DIY Alex – YouTube
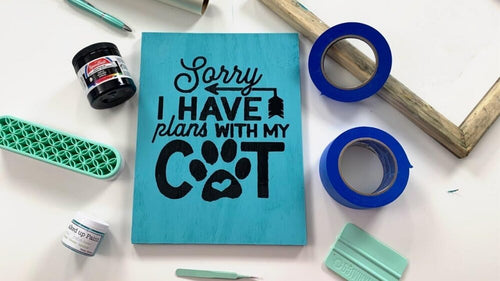
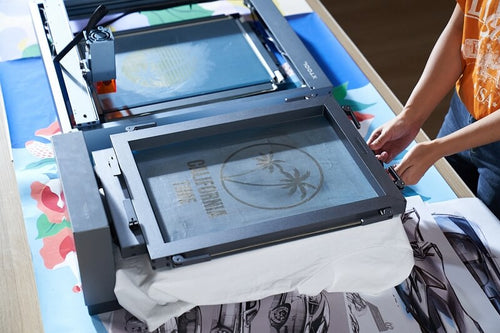
Screen printing on wood is popular for creating signs and artwork. It is particularly admired for its ability to produce bold, colorful prints that are durable and can handle the texture variations of wood.
Materials Needed
To screen print on wood, gather these materials.
Wood: For screen printing, you need fine-grain wood, especially if you’re making a very detailed design. Choose wood without lacquer; the coated one won’t absorb paint well. Also, light hue wood is best suited, as colors are more prominent on it.
Screen Printer: Choose a screen printer that can securely hold both the stencil and the wood. It should have a large enough platen for the wood and adjustable height to fit screens of various sizes. xTool screen printer is an ideal choice for screen printing on wood.
Other Accessories: You will need additional items like inks and a squeegee for spreading the ink. Water-based inks are preferable for wood as they absorb better, unlike plastisol inks which can create a top layer that might peel off.
xTool screen printer comes with all these accessories: a set of pre-coated screens, a squeegee, and some water inks.
Laser Engraver: In order to follow the modern, quick screen printing approach, you need a laser engraver for engraving and making designs on the pre-coated screens. This turns them into design stencils.
Step-by-Step Process
To effectively screen print on wood, follow these steps:
1. Place the pre-coated screen in its frame. Make sure it’s fully stretched and taut.
2. Prepare your design in a digital format. For single-colored designs, you can directly engrave the design onto the frame.
3. For multi-colored designs, split the design into separate layers, each representing a different color, and print each layer on a different screen.
4. Choose a piece of clean, fine-grain wood and set it up inside the screen printer. Adjust the setup so that there's a small gap, about 1/8 inch, between the screen and the wood. This distance is especially essential for wood screen printing.
5. Apply water-based ink onto the frame. Then, use a squeegee to spread the ink evenly over the surface of the wood. If your design has multiple colors, change the screens accordingly to apply each color.
6. Allow the ink to air dry for a few minutes. If you're in a hurry, a heat gun can be used to expedite the drying process.
Creative Ideas and Applications of Wood Prints
With laser printing and screen printing on wood, you can explore numerous creative avenues to craft unique and personalized items. Here are a few ideas:
Personalized Gifts
Laser printing on wood is ideal for creating personalized gifts. Engraved wooden accessories like cutting boards are not just useful kitchen tools but can also carry sentimental value. For instance, a cutting board engraved with a family recipe or a special date is a treasured gift.
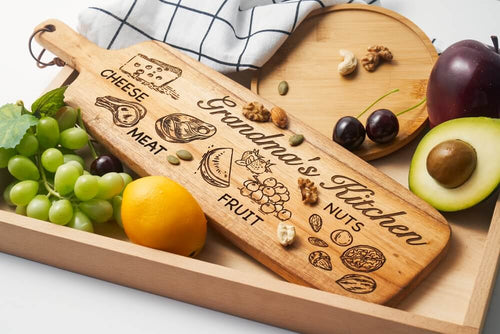
Wooden picture frames can be adorned with personalized messages or quotes, perfect for weddings, anniversaries, or birthdays. Small items like wooden jewelry boxes, coasters, or keychains can also be engraved.
Home Décor Items
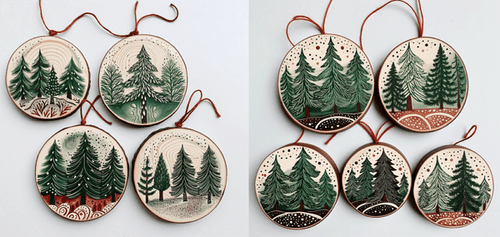
Screen printing on wood can significantly enhance home decor. You can create custom wooden panels with artistic designs or patterns to make unique wall art. Consider styles that complement your home's existing decor, such as minimalist patterns, botanical prints, or abstract art.
Sign Boards and Displays
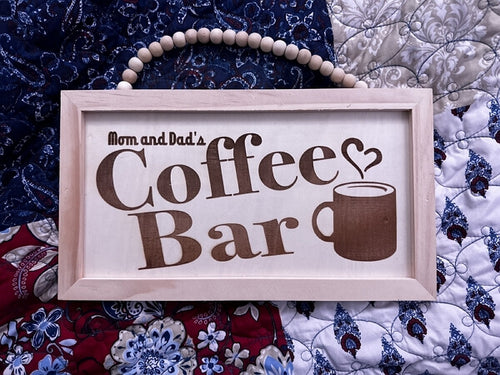
Both laser engraving and screen printing are effective for creating signboards and displays on wood. They’re best for producing bold, clear text and graphics that are easily visible from a distance. You can create everything from elegant welcome signs for events to stylish informational displays for businesses.
Art Projects

Using wood as a canvas for art projects opens up a world of creativity. You can use laser printing to engrave detailed, intricate designs or images onto wooden panels. On the other hand, screen printing is perfect for applying vibrant, colorful patterns or artwork on larger wooden canvases. These can be abstract designs, nature scenes, or any imagery that inspires you.
Festive Ornaments
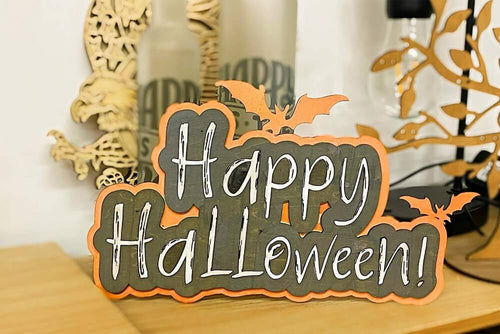
Wooden ornaments for festivals like Halloween, Thanksgiving, and Christmas can be beautifully crafted using both laser and screen printing techniques. For instance, you can screen print Halloween motifs like ghosts, pumpkins, witches, and bats. Similarly, laser engrave decorative wooden plaques with messages of gratitude or autumn-themed designs.
Conclusion
Like paper, wood is perfect for customization through printing. You can either carve intricate designs on it through modern laser printing or add colorful patterns through screen printing. Both these methods are relatively simple to implement, provided that you have the right tools and follow the correct process.


