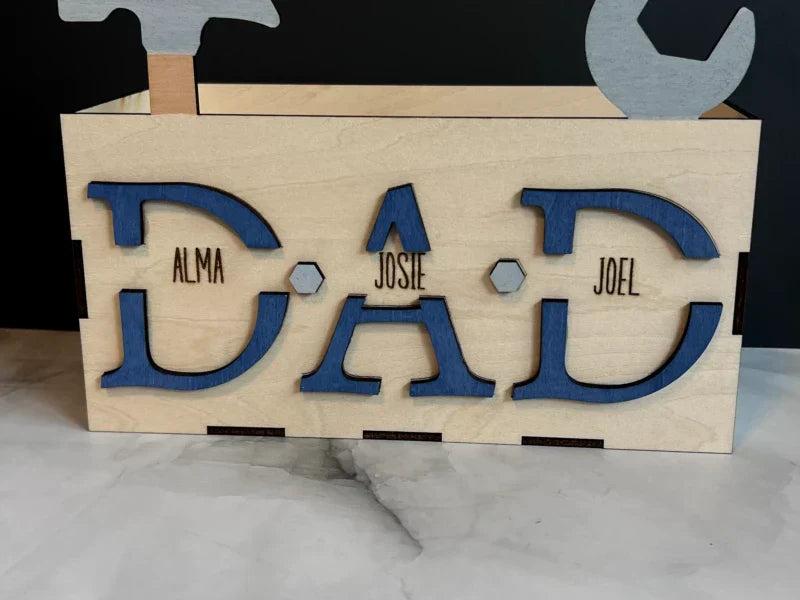
Many of us would like to display our favorite ones in picture frames at our homes and offices. If you want to display your pictures, you can make a picture frame of your choice. A laser cutter would be an ideal tool for this DIY project. You can cut the design you like and create a picture frame without any hassle. By using a laser machine, you can make whatever you want and turn your imagination into reality.
This DIY project is full of fun, creativity, and excitement. Plus, you will get the personalized frame you like at a fraction of the market price. We are going to explain everything you need to know. We will share the materials you need, the selection of the right laser cutter, and the step-by-step process of creating a DIY picture frame.

In This Article
- Materials Needed to Make a DIY Picture Frame
- Selecting the Right Laser Cutter
- 7 Steps to Make Your Personalized Picture Frame
- Conclusion
Materials Needed to Make a DIY Picture Frame
Plywood or MDF
The base or primary material for making a picture frame could be plywood or MDF. These are the ideal materials to create a sturdy frame; however, acrylic can also be used.
You can get plywood, MDF, or acrylic sheets from online stores. 2-3 mm thickness is more than enough. But before ordering, check your design file and get an estimate of the size of the sheet required. It will also give you a better idea of the number of sheets you need. You can also get large plywood and MDF sheets that usually measure around 4 x 8 feet. Then, you will need a circular saw, jigsaw, or any similar tool to cut the sheet into smaller pieces according to the working area of the laser machine.
Moreover, make sure you are buying laser-safe MDF or plywood. Otherwise, they may contain harmful and toxic elements that can be dangerous when reacted with laser beams.
Laser Cutting Machine
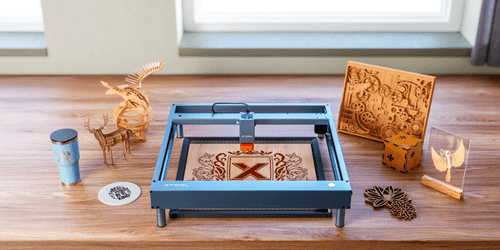
The laser cutting machine is the main tool for this DIY project. It will be used for cutting the desired shape of the frame from MDF, acrylic, or plywood sheets. Cutting materials through a laser machine is easier. The machine can cut intricate designs and engrave anything you like on the frame. The finishing of the cuts made by the laser machine is commendable. Beginners can easily use a laser cutting machine. It is safe and quite easy to use. They only need to upload the file and follow a few simple steps that we will discuss later in this post.

xTool D1 Pro Diode Laser Cutter

Safety Equipment
For operating a laser machine, some safety equipment and measures are necessary. Firstly, you need a pair of glasses that will protect your eyes from harmful laser beams. There are specific glasses designed for laser machines, and you should wear them while using the machine.
Laser machines can start a fire because they produce extreme heat. So, always keep a fire extinguisher where you are operating the laser machine. It is quite helpful to extinguish the fire and prevent accidents. CO2 fire extinguishers are recommended by laser machine manufacturers.
Glue
The picture frame will be in several parts, and finally, you have to assemble everything. You will have to use glue to stick pieces together. For sticking wood and similar materials, German glue is an excellent choice. It appears to be white when you apply it but after drying it becomes transparent.
Paint
After assembling the pieces, you can paint the frame to make it more appealing. For that, spray paint is the recommended option because it is easier to apply. You can also do acrylic paint, oil paint, or whatever you like.
Frame Hooks or Hanging Rope
If you want to hand the frame, you need frame hooks or a hanging rope. You can select any of them. However, some picture frames have a base that keeps them standing. Thus, there is no need for hooks and ropes.
xTool D1 Pro Diode Laser Cutter
Types of the Laser Machines
You will find different types of laser machines on the market, such as the fiber laser, CO2 laser, diode laser, and infrared laser. These are compatible with specific materials.
For cutting wood and acrylic, you can select a CO2 or Diode Laser. Both these laser machines are commendable, and they can do the job with perfection.
CO2 laser cutters are extremely powerful, and they can cut wood and all colors of acrylic in no time. The wavelength of these laser machines is around 10,600nm, which is ideal for such materials. But keep in mind that these laser machines are expensive. The desktop CO2 laser machine will cost you around $3,000 to $7,000.
xTool P2 55W CO2 Laser Cutter

Diode lasers are not as powerful as CO2 lasers, but they can also cut plywood, MDF, softwood, hardwood, acrylic, and various other materials. But these lasers have a wavelength of 455nm, which is not suitable for blue and transparent acrylic. Other than that, you can use them without any worries. The best thing is that these laser machines are quite affordable. A desktop diode laser cutter would cost around $700 to $1,500. You can do all your DIY projects with it.
xTool D1 Pro Diode Laser Cutter
Optical Power
The optical power of a laser machine defines how powerful it is. It is a must to see the optical power when choosing a laser machine.
You will find various power ratings in the specification. Don’t confuse it with the machine power and module electric power. The machine power is the electrical power of the machine, and the module electric power defines the electricity consumption of the laser module. You need to see the optical power, which shows the cutting capability of the laser machine.
The optical power of the diode laser should be 20W to 40W. You will find lesser power as well, but those laser machines are only suitable for engraving. They take too much time cutting thick materials. If you are buying a CO2 laser, then its power should be above 30W.
Size of Working Area
Beginners often ignore the size of the working area, and after buying the laser machine, they regret it. The working area gives you a clear idea of the maximum size of the object that the machine can process.
The working area of a CO2 laser should be around 20 x 10 inches or more. Diode laser machines should have a working area of at least 15 x 15 inches.
Ease of Use
The machine should be beginner-friendly. If you are using the machine for the first time, make sure there are enough tutorials and support from the company. Secondly, if there is dedicated laser cutter software for the laser machine, it would be great for beginners.
Safety Features
Laser machines should have various safety features to mitigate hazards and prevent accidents. Firstly, there should be a cover around the laser module to prevent laser beams from escaping the area. If the laser machine is enclosed, it is better.
The machine should have a built-in fire alarm. It will sense the flame and turn off the machine automatically. It will save you from massive losses. Some laser machines are also compatible with fire safety kits. You can install the kit, and it will extinguish the fire on its own. It contains a CO2 fire extinguisher.
There should be tip-over safety. A laser machine can be vulnerable if it is tilted because the laser beams can harm anyone. For this, the manufacturers install a gyroscope that senses the tilt and turns the machine off.
The machine should have an emergency stop. It is quite helpful in stopping the machine when it is running. These are some common safety features that a laser machine should have.
7 Steps to Make Your Personalized Picture Frame
We are using xTool D1 Pro 20W to make this personalized picture frame. If you are using any other machine or laser module, you can adjust the settings accordingly. Secondly, we are using XCS software for this project. You can also use Lightburn or any other software compatible with your machine.
Step 1: Safety First
It is necessary to take all safety measures before using a laser machine. The operator should be careful and vigilant when the machine is working. To prevent any accident or mishap, it is better to pay attention to safety first.
Laser beams are harmful to your retina, and they can damage it badly. For that, you need to wear specific glasses that are designed for protecting your eyes from laser beams. Put on your safety glasses and then proceed.
The second most important thing is a proper ventilation system. When you cut materials using a laser machine, smoke and a pungent smell are produced. Sometimes, this smoke can be toxic or harmful. It might harm your respiratory system. Thus, a proper ventilation system is a must.
You can use the machine in an open area. But mostly, people use it inside their houses. If the machine is enclosed, you can connect the exhaust pipe to the machine and expel the air out of the house. But if the machine is not enclosed, get an enclosure first and then connect the exhaust pipe.
A better option is using an air purifier. It will purify the exhaust air and remove the particles and odor. You can then use the machine even inside your kitchen.
For safety purposes, keep a fire extinguisher nearby. While cutting wood, there are chances of a fire. It will help you extinguish the fire quickly.
Never leave the machine unattended. When you are cutting the picture frame, keep an eye on the machine. The process may take several minutes to an hour, depending on the size of the frame, the number of pieces, the thickness of the material, and other factors. Do not leave the place until the cutting or engraving is completed.
Step 2: Designing Your Picture Frame
For laser cutting, you need a design file in the compatible format of the laser machine. It could be DXF, SVG, AI, etc. You can make the whole design on Adobe Illustrator, Inkscape, or any other software you find suitable.
If you have an experience in graphics design, you can create your own design without any hassle. You can make a unique design of your choice by considering the size, style, and other details. Otherwise, you can get free designs from multiple websites, such as 3axis and Ponoko. There are also premium sites where designers sell their files, and you can buy them. After getting the ready-made design, you can make some changes, such as inserting some engraving patterns, names, and dates.
Once the design is ready, open the laser software and import the design. Some laser software, such as XCS, also allows you to make some changes in the design.

Step 3: Setting Up Your Laser Cutter
Turn on the laser machine and connect it to the computer. Now, you need to adjust the settings of the laser on the design. But before that, it is better to do a power-speed test on the spare material. You can create some squares or circles and enter some random power and speed values. It will give you a better idea of the optimal settings and save you time and material.
Enter the power, speed, and number of passes. In our case, we have set the power at 100%, speed at 5 mm/s, and number of passes at 2. We have achieved commendable results in these settings. You can adjust the settings according to your laser’s optical power.

Step 4: Cutting and Engraving Your Picture Frame
Place the MDF or plywood sheet in the working area. MDF is usually straight without any bends, so it will lie perfectly on a plain surface. However, plywood can have bending. In such a case, you should secure it using magnets on the honeycomb panel. You can also use masking tape to secure the plywood on the surface.
Now, adjust the focus of the laser module according to the thickness of the material. Adjusting focus in xTool D1 Pro is pretty easy. Just put the lever down and move the laser module so that the lever touches the surface of the material. Lock the laser module there and revert the lever.
Move the laser module to the starting position. Click on the Process button. Now, here comes an important step. Click on the Framing button. Now, press the button on the machine to frame the design on the material. It will give you a complete idea of the size of the design and help you ensure everything is within the limits.

Finally, click on the Start button and start cutting the material. During this process, make sure the laser is enclosed and the exhaust system is working properly. Use safety goggles and do not leave the machine unattended.
Step 5: Assembling and Finishing the Picture Frame
After cutting the frame, take out the sheet carefully from the working area. Clean the parts and assemble them. You will need glue here to fix the pieces. Apply glue and let it dry for a few hours.
Your picture frame is now ready, but before inserting pictures, make it sturdier and more appealing. You can also use some screws if needed to fix the pieces. But make sure to use small screws because the plywood is 2-3mm thick.
In our case, we do not need frame hooks or rope. It has a base, which makes it a standing picture frame. But if yours is different, you can fix the hooks or rope using screws.

Step 6: Fitting Your Picture into the Frame
The fitting of the picture depends on the frame. In our case, we only need to insert the picture from the top. But in most picture frames, you need to mount the images and then place a backing, which is fixed to the frame using glue.
Conclusion
Creating a picture frame using a laser machine is an interesting DIY project. You can convert a small sheet of plywood or MDF into a beautiful picture frame. It is possible to design the frame as you like, but if you are not a designer, you can get laser-cut files from websites. Don’t forget to engrave your name, date, quote, or anything you like to make the frame personalized. We have shared the step-by-step method to complete this DIY project. Follow the steps and share your results on the xTool Community or FB page.
A laser machine can be your DIY partner. It can help you turn your imagination into reality. You can do tons of DIY projects and make some cool items for yourself and some customers.
For more questions. Please join our Facebook group to get inspired!

Related Articles

How to Engrave Glass: Top 3 Ways Explained
How to Sub-Surface Laser Engraving Glass Ball?